Good day All,
Welcome back!!! As a system admin wanted to try all the things i do on-premise see how to achieve it Azure , so named this Series as SysadminLab
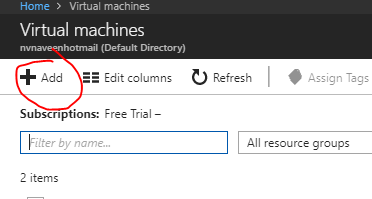
So First article will go over create a Virtual Machine see what are is required .
Note as a Windows guy i like GUI so will try to stick with that if needed only will use Powershell.
Pre- requesties you will need before you think to create a VM:
1. Resource Group
2. Storage Account
3.Subscription details
4.Virtual Network
5.Subnet
6.Public IP if required access over internet
7.Network Security Group
8. Availability Set
Must be wondering WOW so much , as for starts Resource Group Name, Subscription,Virtual Network, Subnet is what needed like Storage Account you can auto create same is the case for Network Security Group and Availability Set.
There are 2 ways to do it, either create all these things ahead of time and then pick from drop down menu or during the Virtual machine creation you get the option to Auto create and you can do so.
As part of the connecting Azure to On Premise i already created a Virtual Network 10.1.0.0/16 and created a Production Subnet as 10.1.0.0/24 so will not show how to do you can refer this link


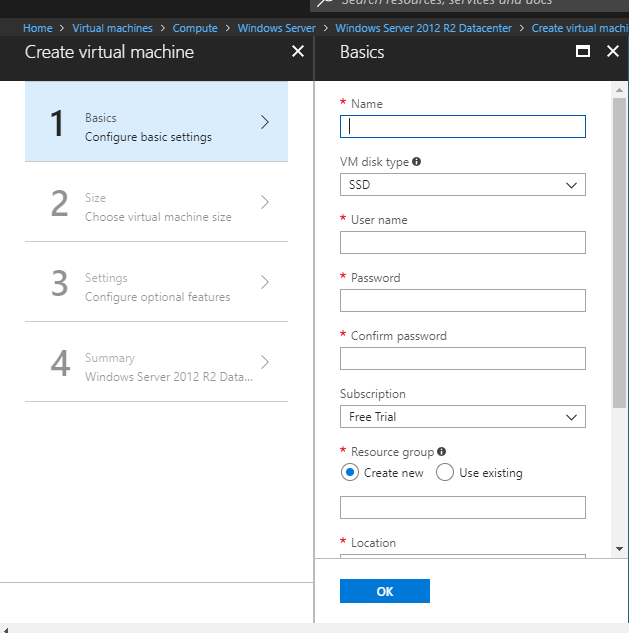
Under basics give the details and click ok


Select a Compute Size and you see how much it cost Per-Month so Select
Under settings , for now i am creating High Availability. Note if you have any plans to do it it should be done only when you creating a Virtual machine. For now there is no option to add existing Virtual Machine to a Availability Group
We have Power shell command we will use that will create the VM by deleting existing VM in Availability group in this SystemAdmin Series.
For Storage we are picking Managed disk, which means disk will be managed by Azure and they give 99.95 SLA on it. If you need more than that then they have other Storage redundancy available that we will discuss later or just google on it.
When you click Network and Virtual Network you have the option to create new Network or use the existing one, so i picked already the existing one .If you need to refer see above in the article gave a link to that.
As i already had a Production Subnet 10.1.0.0 so when VM is created it will autopick a IP in the range and gets assigned unless you go in and change the IP to Static.
Public IP Resource is auto created for you or if you have existing IP you can use.
Network Security Group which is like a Firewall is auto created with Port 3389 Opened
Rest of the details i picked default and click ok


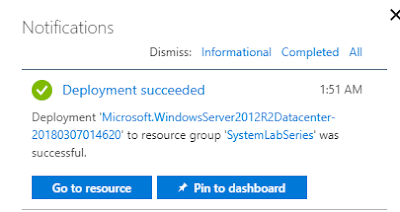
So VM with Windows 2012 R2 is deployed.
Lets check couple of things
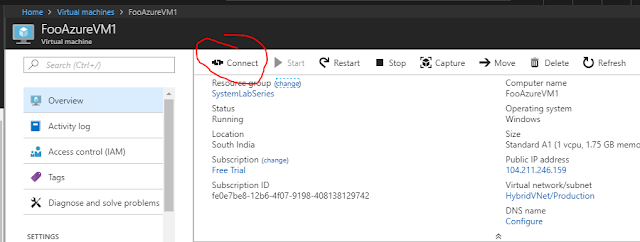
1. Virtual Machine Status

2. How to RDP to the Server from Internet
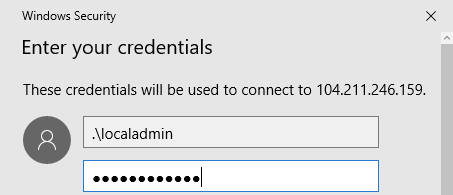
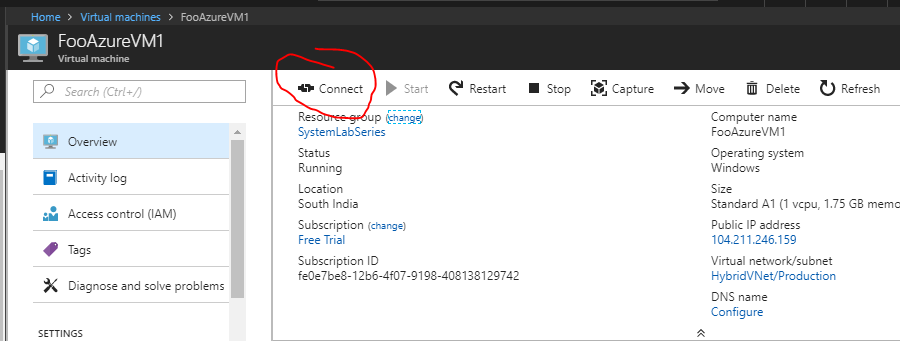
Click on the VM FooAzureVM1 and click connect to download a RDP file to connect.

Open the RDP file and Will show the Public IP it is connecting to

3. Verifying the Server name and IP (DHCP gave a IP from the Production Subnet)

4. So how was RDP traffic enabled by default?
So it auto created Network interface called Fooazurevm1496 assigned a IP of 10.1.0.6
Auto created Network resource group name as FooAzureVM1-nsg and added a inbound rule to allow port 3389 from internet

So its advice able that you create a Virtual Machine name it as Jump Server and assign Public IP only to that and any machine you create in that Subnet don't assign any Public IP as part of security so that no one from cloud tries to access it,
Also the VM acting a Jump Server you you will add a rule such that only certain Subnet and only certain group will be able to RDP etc.. should be done as part of securing the Server.
Next in the System Admin Lab series would be to assign the Virtual machine to existing Active directory so until next one you all have good day!!!!!!!!!!!!!!!!!!!!!!!!!!!!!!!!!!!!
Welcome back!!! As a system admin wanted to try all the things i do on-premise see how to achieve it Azure , so named this Series as SysadminLab
So First article will go over create a Virtual Machine see what are is required .
Note as a Windows guy i like GUI so will try to stick with that if needed only will use Powershell.
Pre- requesties you will need before you think to create a VM:
1. Resource Group
2. Storage Account
3.Subscription details
4.Virtual Network
5.Subnet
6.Public IP if required access over internet
7.Network Security Group
8. Availability Set
Must be wondering WOW so much , as for starts Resource Group Name, Subscription,Virtual Network, Subnet is what needed like Storage Account you can auto create same is the case for Network Security Group and Availability Set.
There are 2 ways to do it, either create all these things ahead of time and then pick from drop down menu or during the Virtual machine creation you get the option to Auto create and you can do so.
As part of the connecting Azure to On Premise i already created a Virtual Network 10.1.0.0/16 and created a Production Subnet as 10.1.0.0/24 so will not show how to do you can refer this link


Under basics give the details and click ok


Select a Compute Size and you see how much it cost Per-Month so Select

Under settings , for now i am creating High Availability. Note if you have any plans to do it it should be done only when you creating a Virtual machine. For now there is no option to add existing Virtual Machine to a Availability Group

We have Power shell command we will use that will create the VM by deleting existing VM in Availability group in this SystemAdmin Series.
For Storage we are picking Managed disk, which means disk will be managed by Azure and they give 99.95 SLA on it. If you need more than that then they have other Storage redundancy available that we will discuss later or just google on it.
When you click Network and Virtual Network you have the option to create new Network or use the existing one, so i picked already the existing one .If you need to refer see above in the article gave a link to that.

As i already had a Production Subnet 10.1.0.0 so when VM is created it will autopick a IP in the range and gets assigned unless you go in and change the IP to Static.

Public IP Resource is auto created for you or if you have existing IP you can use.
Network Security Group which is like a Firewall is auto created with Port 3389 Opened
Rest of the details i picked default and click ok


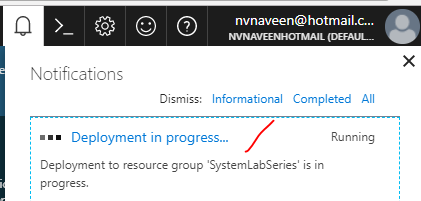

So VM with Windows 2012 R2 is deployed.
Lets check couple of things
1. Virtual Machine Status

2. How to RDP to the Server from Internet
Click on the VM FooAzureVM1 and click connect to download a RDP file to connect.

Open the RDP file and Will show the Public IP it is connecting to


3. Verifying the Server name and IP (DHCP gave a IP from the Production Subnet)

4. So how was RDP traffic enabled by default?
So it auto created Network interface called Fooazurevm1496 assigned a IP of 10.1.0.6
Auto created Network resource group name as FooAzureVM1-nsg and added a inbound rule to allow port 3389 from internet

So its advice able that you create a Virtual Machine name it as Jump Server and assign Public IP only to that and any machine you create in that Subnet don't assign any Public IP as part of security so that no one from cloud tries to access it,
Also the VM acting a Jump Server you you will add a rule such that only certain Subnet and only certain group will be able to RDP etc.. should be done as part of securing the Server.
Next in the System Admin Lab series would be to assign the Virtual machine to existing Active directory so until next one you all have good day!!!!!!!!!!!!!!!!!!!!!!!!!!!!!!!!!!!!
No comments:
Post a Comment