Monday, January 25, 2016

MY LAB on Hyper V

Good day All,

Welcome back!!! 

With Windows 2016 , i think Microsoft is bridging the gap with VMware so you will see lot of customers moving to Hyper V.

Before i proceed with creating a 2 Node 2012 R2 cluster in my case is on a Hyper V host  just wanted to share with you all how i setup my LAB.Kindly note this is not going to be training session for Hyper v, all i am going to show is with limited resource available like a i5 desktop and laptop you can create clustering\Hyper V labs and play with it.

As i told before i have 2 desktops 8 GB each  running Windows 2008 along with a Laptop Windows 10 of 16 GB ram .

Below is just a example of My LAB:

Domain Name: vlab
IP Address Range: 192.168.1.33 - 192.168.1.199

DC:
foodc - 192.168.1.20 Windows 2012 R2


Hyper V Cluster:

Hyperv2012A - 192.168.1.25
Hyperv2012B - 192.168.1.26

FileShare Cluster:

FooFS1 - 192.168.1.27
FooFS2 - 192.168.1.28

Private IP: 10.0.0.1
Private IP: 10.0.0.2


1. Before you even start, you will have to assess how much memory you have on the host and how you want to allocate memory for each VM's

Windows 2008 R2 came with the dynamic memory option and with 2012 using VM creation by default dynamic memory is selected .VMware guys may say as ballooning but it is technically not.

If anyone wants to know more about dynamic memory please google it :)


2. Coming up with IP Range for your LAB is very important.

 3.. disable Password policy in Domain Policy- Why? because you don't want to have complex password for users in the LAB and also don't like to keep resetting password every 30 days, that's why :)


4. Before you make the VM as Domain controller i have seen lot of people not setting there TCP/IP properties well.. make sure this is some this like below.. DNS  can be either IP of the host or Local host IP and if IP6 not required just disable them.

Also most important thing is what is the domain name you want to use so make a note of it before you install the Domain Service Role.


Making this as Domain controller is just by adding the below role and if this is the first Domain controller then during installation this will check if DNS is available and if not it will install it for you.


5. Differcing Disk:  Lot of guys don't know this option but this is one of the best option to save you disk space , let me show you how?

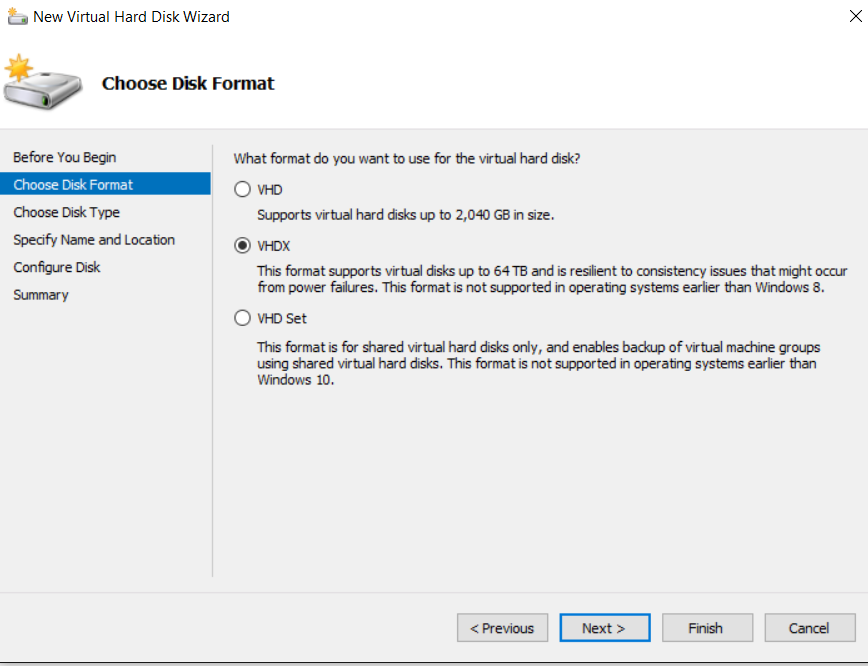
a. Create a template VM, you can use either fixed disk or preferable dynamically expanding disk so  the drive increases as it grow.
With 2012, VHDX is out there and 2016 VHDX format of disk is preferred way of creating the disk , it has lot of advantages so i will let you guys google on it.
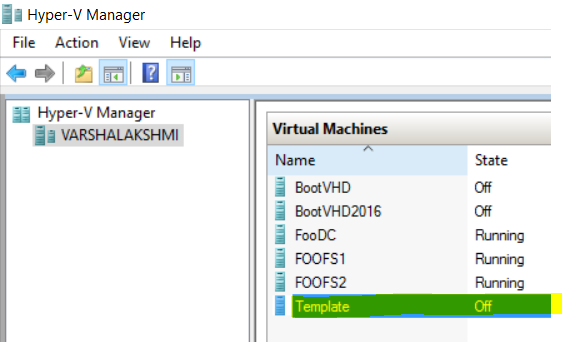




if you see the disk size its only 9 GB.


b. After Setting your Template VM boot with OS either 2008/2012/2016 and disable if required Firewall, UAC ,IPv6 and then run Sysprep as below and shut it down.


c.  Now create your VM's in my example i am creating 2 VM's for my Cluster. So create a VM but at the step to add disk just say Attach a Virtual hard disk later and finish the VM creation as below.


Now lets create a HardDisk and attach to VM. 


The beauty with the above option is it only records the changes and refer to base Template Image for rest of the details.


We are pointing the source disk at the VHD or VHDX we created as part of Template, ran Sysprep and shutdown right?

Now lets attach the disk to VM, that is in my example FOOFS1.
Just click browse , point to the new Hardisk you created and click apply in VM Settings.


After attaching, boot up your VM it will go with OS install as we ran sysprep right and there you go brand new OS install done.

Lets see how much is the disk size???? only 1.5 GB so the same way you can create Multiple copies of OS you want and take advantage of Differencing disk.


6. Boot Through VHD\VHDX:

This is a great way of testing your new OS, you may say how?????

As i said, i have 2 desktops 8 GB ram running Windows 2008 OS.I wanted to install Windows 2012 or Windows 2016 so what i had to do is try multi boot option , install the OS etc the normal steps.
But with boot from VHD, this is what you will have to do it

1. Create a Virtual Machine with fixed disk lets say either Windows 2012 or Windows 2016

2. After OS install shutdown the VM, except the Virtual disk VHD you can delete the VM configuration files.
3. Create a folder in the existing OS, in my case was Windows 2008. ex d:\2012vhd and copy over the VHD to the folder.
4. Go to disk management and attach the VHD\VHDX pointing to the VHD\VHDX you copied in the folder.


After you click OK , it will assign a drive letter in my case it was F:\


5.Open a CMD prompt with Admin rights and run the below command

bcdboot  <mounted driver letter:>\windows and press enter.


6. Now if you reboot the Sever in my case desktop , you will see multi boot option for Windows 2012,windows 2008 in my example..


this was easy instead of going through pain of installing the whole OS and finding drivers etc for it work properly.

Note: Boot through vhd/vhdx works the same way as normal PC you can install everything and test it.


So my LAB is ready with 2 Hyper V host and 2 VM Host for clustering so next topic would be to start playing on some Hyper V testing and migration to new 2016.

If anyone curious how long it took me to setup my LAB almost 2 days of planning and executing.. well with my daughter around it was not easy :)

Hopefully this may help someone!!! until next one you all have a good day!!!


Saturday, January 23, 2016

iSCSI Target creation on Windows 2012 R2

Good day All,

Welcome back and this is going to be my first post this year.. I was not sure where to start and which topic and with Windows 2016 Technical Preview 4 out there it almost tempted me to try couple of topics like Hyperv Cluster moving from 2012 to 2016 a rolling upgrade with no downtime we can move VM's and lot more.. So today i was preparing my LAB and just build a DC, now the same DC will act as iSCSI Target Server for all my future testing so thought to share with all how to set it up,

Before i do just wanted to thank my Wife for Presenting me a brand new HP 15t 16 GB RAM laptop , now i have 2, 8 GB desktop and 1 Laptop with 16 GB so i can test most of the scenarios and post more topics which may help someone and help me too in learning.

Until before 2012 iSCSI Target was a add-on and now its been included in Roles and Features.. this helped all of us in Testing and playing lot with clustering and to present this Lun's to Vmware Farm as datastore.


I have added 3 disk , 2 disk of 100GB and 1 disk of 1 GB.
So i have selected the E drive of 100GB to create a Virtual disk which will be presented to Cluster Servers.

Friend;y name of Virtual disk

I took all the space for Virtual disk.
iSCSI Target is where lot of people get confused.This is just a Name where you want all you disk which are assigned to Particular client Servers.For example i need 2 99GB Luns and 1 1GB LUN for my 2 Node cluster so i create a Target name so that i can group all the 3 LUN's under the same Target .Tomorrow if you decide to create a new Cluster you can create a new Target and associate disk to that target so that you know which Virtual disk are associated to which Servers.
As this is first time i am creating the Target and named as FOOFS, as my 2 Node Clusters that will be accessing this LUNs are FOOFS1,FOOFS2.

Now we need to tell which Servers will access this Virtual disk, in my case as said it will be 2 Node cluster so i will need to add 2 Servers FOOFS1,FOOFS2.

After clicking add and you put in your First Cluster Name.

If you get the above error that means that you have not initialized your host iSCSI initiator in my case are FOOFS1 and FOOFS2 , so follow the below steps...

Please do that on both the nodes of the cluster.Now you come back and add both the nodes this time and it should get added with no errors.


if you need to add authentication do so, if not just leave blank and click Next.

I have added 1 Virtual disk of 99 GB , i need 1 more disk of 99GB and 1 GB disk for quorum so lets add them to same iSCSI Target FOOFS.
 
As you see below i have picked existing Target so that i can group all 3 LUNS .

i did the same for the last LUN and after done you will see something like this


So we have successfully created the disk required for 2 Node cluster.So lets add the disk to both the nodes.

On both Nodes you will need to do this


Note: Incase you don't see the LUNs on the host Servers, just go to Target Server which in my case is FOODC and do the below steps for  all LUN which is not visible


So we have successfully added the 3 LUN's to our 2 Node Cluster FOOFS1,FOOFS2.
Next article i will go over creating cluster and also how to create a Application share which can be used to store Virtual machine until then you all have a good day!!!


Hope this helps someone!!!!


Tuesday, December 22, 2015

Moving from one Domain to another for Windows 2003 Cluster - Lessons Learned

Good day All,

Welcome back!!!

Today i will go over challenges we had moving a 2003 Cluster from one domain to another.I know I know you guys would be wondering you still have Unsupported OS, well i guess we do and i may not be the only one in the world i guess :)
We are making progress, right now these Servers was in some other domain and we started doing consolidation and going to Windows 2012 AD, and eventually we will be moving to 2012 or may be 2016 Cluster who knows... but for now will share the lessons learned during the domain change.

Microsoft has a pretty good article our there and here is the Link.So please make to go over and do all the Policy changes believe me i tested my self in lab they Policy changes play a very key role.

Well reading the article you must be thing, hmm this is simple and pretty straight forward why do need another article, well remember Production Servers always never do smooth ride and we had our challenges which i wanted to share to you all

So let me list out..

1. Un-joining from old domain and rejoin to new Domin as per article shutting on passive nodes down and worked on first Active Node. Well unjoin went well, we updated the DNS for new domain in TCP/IP Properties and joined it, guess what we started to get this below error

The computer failed to join the domain. Please contact your domain
administrator and indicate that the computer failed to update the
dnshostname and/or servicePrincipalName (SPN) attritbute in its Active
directory computer account. Once the problem is resolved, you may join the
computer to the domain.


Not sure how how many of you know but when you try to join a domain a log file is setup in the Server c:\windows\Debug\ntsetup.log.
After review we found that Server was trying to join in some other Server in different location in domain but not to the nearest domain controller as specified in DNS1, DNS2 in TCP/IP Properties.
More strange was Computer object was getting created and just disappearing...
It was time to Pull in AD team and after checking couple of things, it was identified that when Unjoining the Server from domain, even though Server is getting unjoined witthout any errors but the Computer object in the trusted OLD domain was not getting deleted and that caused all the issue.
If anyone about to shout saying ID doesn't have domain Admin rights, we do :) but some thing to be investigated by AD team.

So the solution was pretty simple, unjoin from domain, delete the computer object from old domain wait for like 5-10 mints to replicated and then tried it and this time it was all ok

2. Moving on to 2nd issue,...  As i said above we are working on the Primary Active Node as per the Microsoft article..
After adding to new domain, we made all the Local Policy changes as per the Link above and changed the Cluster Service domain name and password and we started the cluster Service..
Well guess what cluster Service just timed out with System event log error 7031.

Now we got struck and started to reapply the Local Security Policy just in-case if anything got missed, nope that didn't help.
So i started to review the cluster logs i was seeing that when we start the cluster Service, Q(Quorum) drive was trying to come online and then going offline and shutting down all the cluster group resources and terminating the Cluster Service.

So first clue we identified was disk/LUN Issue. So to double check i ran the command

net start clussvc /fixquorum

guess what Cluster Service came online and when we checked Cluster Admin MMC, Cluster Name and Cluster IP was online and Q drive was in failed state.. and when check for other drives too those was failed... that was not good.

So i went to disk management and when observed i found that there was active LUN's with drive letters assigned and also same duplicate  LUN's was showing online as below... hmm then i thought that Multi-path issue and disk are showing twice in disk management.


So we reached out to Storage team and they told that for Multipath issue there is updated drivers and after applying and rebooting presto!!! Cluster Service came online with no issues.


3. So 3rd lesson we learned.. I don't think i mentioned before but its our windows 2003 SQL Active/Passive cluster and SQL was brought down and Services of SQL was put to manual too before starting this activity.So we asked the SQL team to change the SQL Service account domain name,account  and password and then started to bring the Service online, all SQL Service came online except the SQL Service account and it failed with this error

SQLServerAgent could not be started (reason: SQLServerAgent must be able to connect to SQLServer as SysAdmin, but '(Unknown)' is not a member of the SysAdmin role).

SQL Service in cluster started so it cant be permission issue so doing some search in one of blog they suggested to make sure the SQL Service account part of " Lock in memory" in local Security policy and reboot the Server.
Well after doing that SQL Service account came back online too with no issues.

Sorry my laptop crashed and couldn't go back to the same blog where it was suggested and thank them but i would like to thank them for the blog and also people like them is helping the community to fix issues.

After all ok on the first Node tested , we moved to 2nd Node and replicated every thing and all went fine with no issues.
Hopefully my lessons learned will help someone too!!!!

Special thanks to my buddy Prasanth who sticked around the issues along with me.

Till next one all have a good day!!!!!!!!!!!!!!!